Bootstrap Popover Position
Intro
The versions
Bootstrap is among the greatest effective and free of cost open-source programs to establish websites. Newest version of the Bootstrap system is named the Bootstrap 4. The program is already in its alpha-testing stage and yet is available to website creators around the globe. You are able to actually create and propose improvements to the Bootstrap 4 just before its final version is introduced.
Usage of the Bootstrap 4
With Bootstrap 4 you have the ability to establish your internet site now much faster than ever before. It is quite very easier to use Bootstrap to establish your web site than various other platforms. Together with the integration of HTML, CSS, and JS framework it is one of the absolute most favored programs for web advancement.
Some functions and techniques in Bootstrap 4
Just some of the most recommended functions of the Bootstrap 4 include:
• An improvised grid structure that allows the user to make mobile device helpful websites with a fair amount of convenience.
• A number of utility instruction sets have been involved in the Bootstrap 4 to help with uncomplicated studying for beginners in the business of online design.
Details to consider
Step 2: Rewrite your article by highlighting words and phrases.
, the bonds to the older version, Bootstrap 3 have not been totally cut off. The developers has ensured that the Bootstrap 3 does get regular updates and bug fixes along with improvements.
Contrasts between Bootstrap 4 and Bootstrap 3
• The service for different internet browsers in addition to operating systems has been provided in the Bootstrap 4
• The general sizing of the font is boosted for relaxing viewing and web site development experience
• The renaming of a variety of components has been accomplished to ensure a quicker and even more trusted website development activity
• By having brand-new modifications, it is achievable to build a much more active web site along with nominal efforts
Bootstrap Popover Options
And right away let all of us touch the major topic.
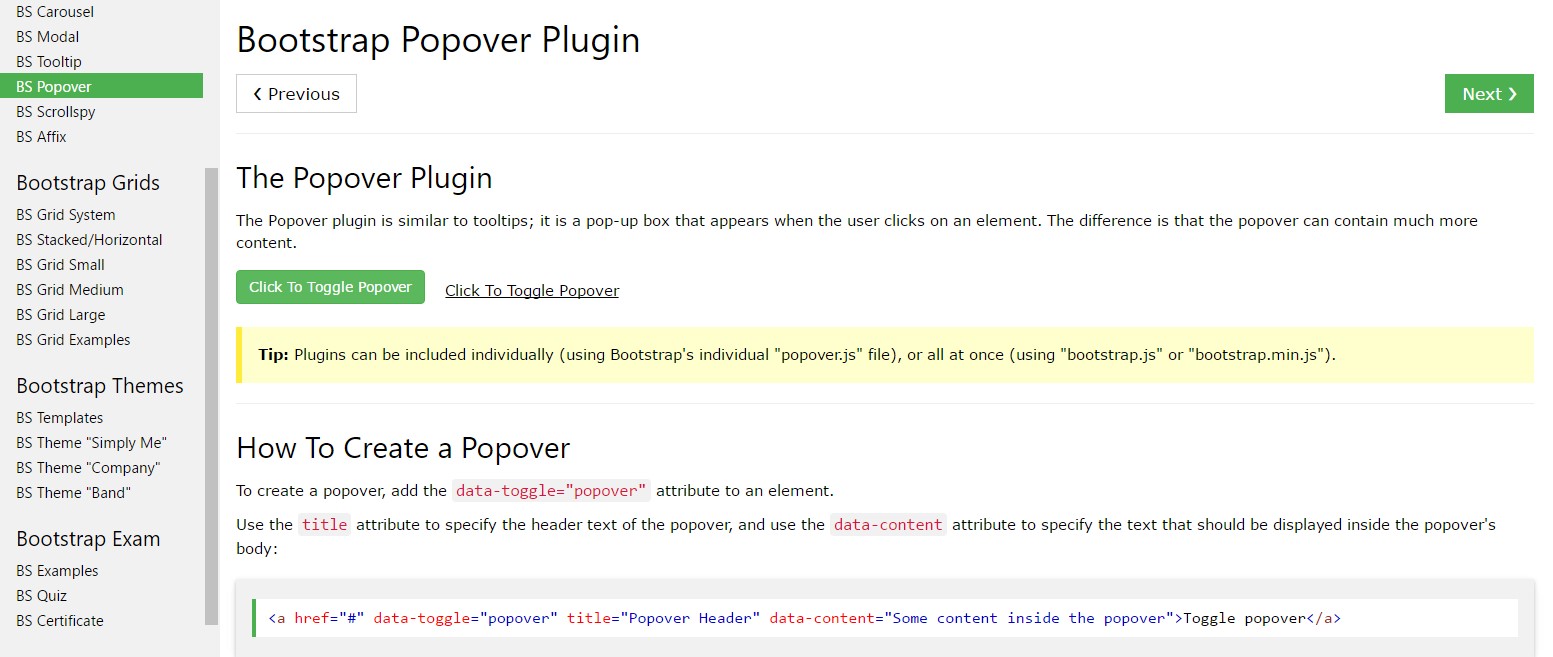
In the event that you wish to include some backup info on your site you can put into action popovers - just incorporate small-sized overlay content.
The way to work with the popover plugin:
- Bootstrap Popover Button depend upon the Third party library Tether for positioning. You must include tether.min.js just before bootstrap.js straight for popovers to work!
- Popovers need the tooltip plugin considering that a dependency .
- Popovers are opt-in for performance reasons, so you have to activate them yourself.
- Zero-length title and content values will certainly never display a Bootstrap Popover Container.
- Indicate container:'body' in order to avert rendering concerns around more challenging elements ( such as Bootstrap input groups, button groups, etc).
- Activating popovers on hidden features will just not act.
- Whenever triggered directly from weblinks that span multiple lines, popovers will be centralized. Make use of white-space: nowrap; on your <a>-s to stay away from this specific actions.
Did you understood? Great, why don't we observe ways in which they function using some good examples.
You must feature tether.min.js right before bootstrap.js in turn for popovers to do the job!
As an example: Enable popovers all over
One practice to activate all of the popovers on a page would definitely be to select all of them by their data-toggle attribute:
$(function ()
  $('[data-toggle="popover"]').popover()
)
Illustration: Applying the container feature
Anytime you provide several looks on a parent component which meddle with a popover, you'll wish to define a custom container That the popover's HTML shows up inside that aspect instead.
$(function ()
  $('.example-popover').popover(
    container: 'body'
  )
)
Static popover
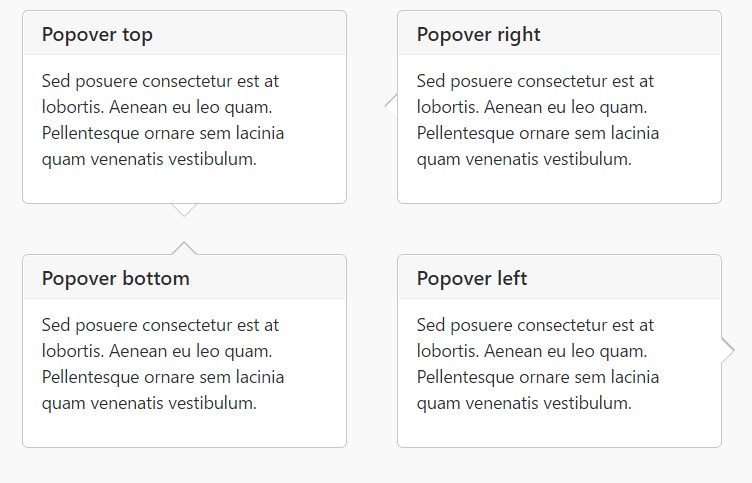
Four options are offered: top, right, bottom, and left straightened.
Live demo
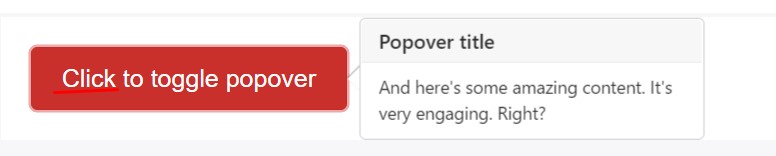
<button type="button" class="btn btn-lg btn-danger" data-toggle="popover" title="Popover title" data-content="And here's some amazing content. It's very engaging. Right?">Click to toggle popover</button>Four directions
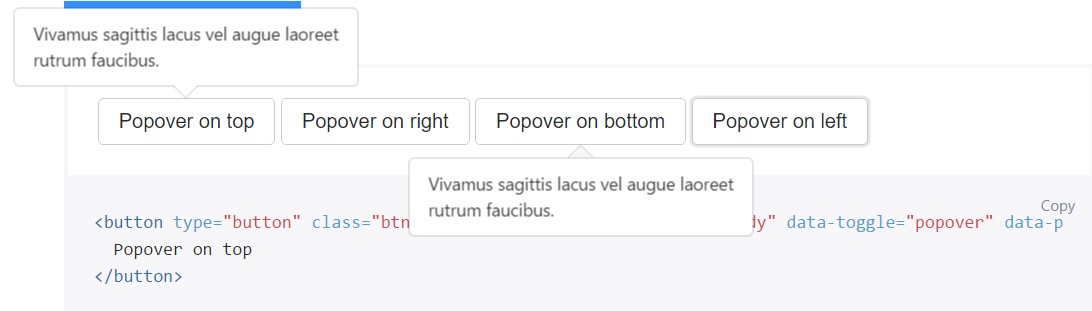
<button type="button" class="btn btn-secondary" data-container="body" data-toggle="popover" data-placement="top" data-content="Vivamus sagittis lacus vel augue laoreet rutrum faucibus.">
  Popover on top
</button>

<button type="button" class="btn btn-secondary" data-container="body" data-toggle="popover" data-placement="right" data-content="Vivamus sagittis lacus vel augue laoreet rutrum faucibus.">
  Popover on right
</button>

<button type="button" class="btn btn-secondary" data-container="body" data-toggle="popover" data-placement="bottom" data-content="Vivamus
sagittis lacus vel augue laoreet rutrum faucibus.">
  Popover on bottom
</button>

<button type="button" class="btn btn-secondary" data-container="body" data-toggle="popover" data-placement="left" data-content="Vivamus sagittis lacus vel augue laoreet rutrum faucibus.">
  Popover on left
</button>
Dismiss upon coming click
Make use of the focus trigger to let out popovers on the following hit that the user makes.
Specific markup demanded for dismiss-on-next-click
For appropriate cross-browser and also cross-platform behavior, you will need to utilize the <a> tag, not the <button> tag, and you in addition have to include a tabindex attribute.
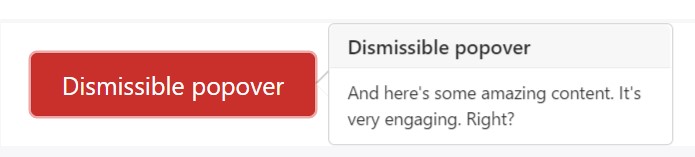
<a tabindex="0" class="btn btn-lg btn-danger" role="button" data-toggle="popover" data-trigger="focus" title="Dismissible popover" data-content="And here's some amazing content. It's very engaging. Right?">Dismissible popover</a>$('.popover-dismiss').popover(
trigger: 'focus'
)Application
Implement popovers using JavaScript
$('#example').popover(options)Solutions
Selections can be passed by using information attributes as well as JavaScript. For data attributes, attach the option name to data-, as in data-animation="".
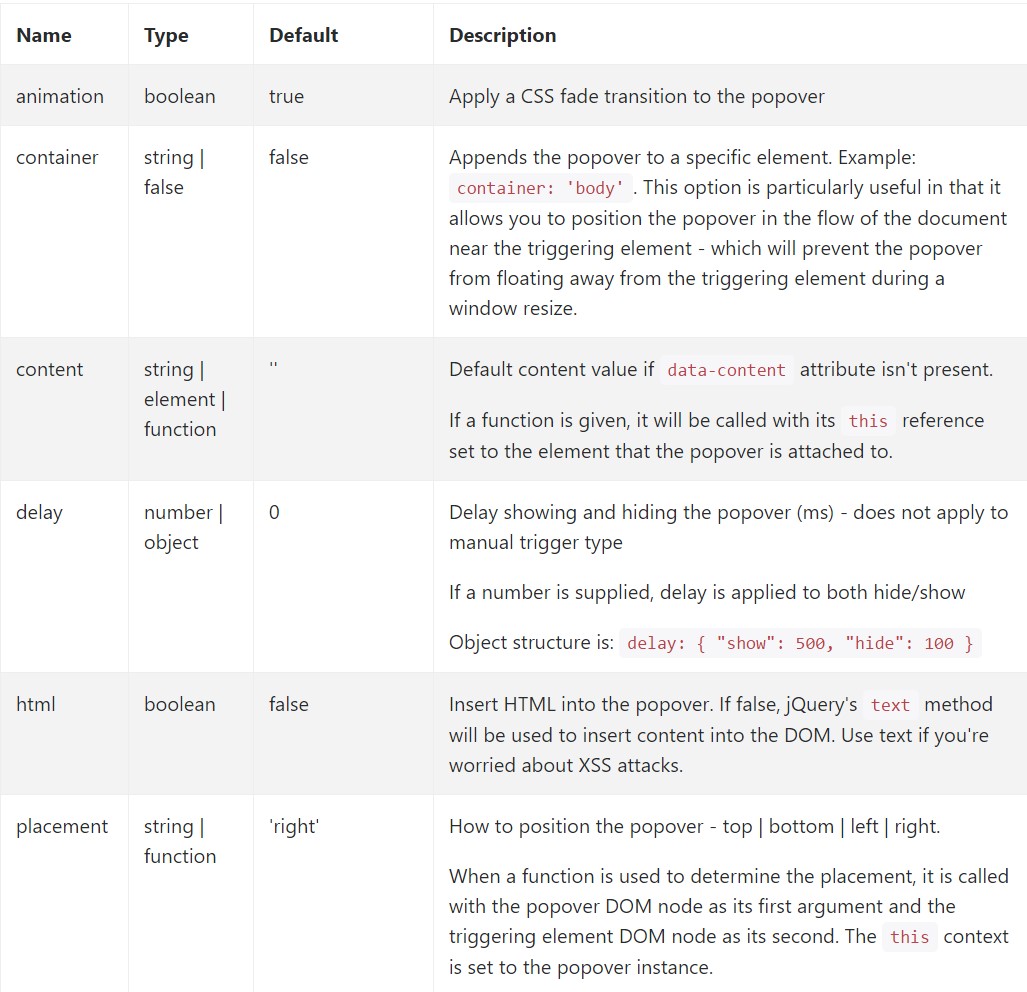
Data attributes for various popovers
Options for specific popovers can alternatively be specified with the usage of data attributes, as illustrated above.
Techniques
$().popover(options)
Initializes popovers with regard to the component collection.
.popover('show')
Uncovers an element's popover. Go back to the user prior to the popover has actually been displayed (i.e. before the shown.bs.popover event occurs). This is considered a "manual" triggering of the popover. Popovers whose both title and web content are zero-length are never presented.
$('#element').popover('show')
.popover('hide')
Hides an element's popover. Come back to the caller right before the popover has truly been covered (i.e. right before the hidden.bs.popover event takes place). This is considered a "manual" triggering of the popover.
$('#element').popover('hide')
.popover('toggle')
Button an element's popover. Returns to the user just before the popover has actually been shown or hidden (i.e. right before the shown.bs.popover or hidden.bs.popover event takes place). This is looked at a "manual" triggering of the popover.
$('#element').popover('toggle')
.popover('dispose')
Disguise and wipes out an element's popover. Popovers which put to use delegation ( that are built working with the selector possibility) can not really be separately eliminated on descendant trigger components.
$('#element').popover('dispose')
Events
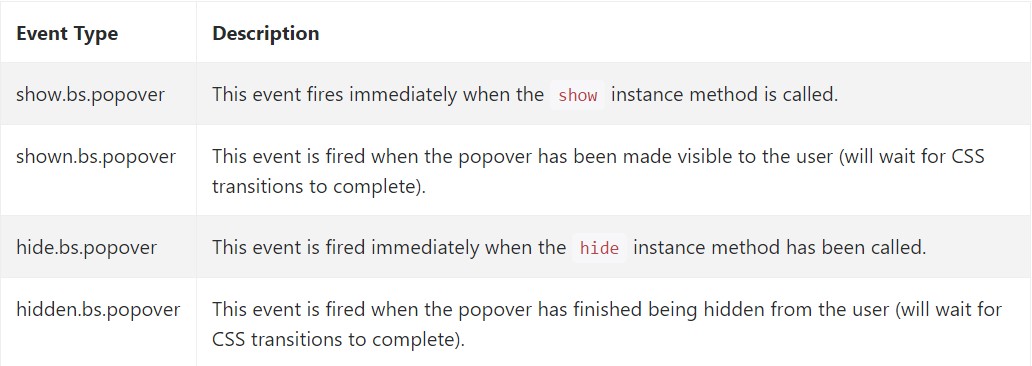
$('#myPopover').on('hidden.bs.popover', function ()
  // do something…
)
Check out several video clip training regarding Bootstrap popovers
Connected topics:
Bootstrap popovers approved records
Bootstrap popovers short training
Bootstrap Popover complication
$().popover(options)
Initializes popovers with regard to the component collection.
.popover('show')
Uncovers an element's popover. Go back to the user prior to the popover has actually been displayed (i.e. before the shown.bs.popover event occurs). This is considered a "manual" triggering of the popover. Popovers whose both title and web content are zero-length are never presented.
$('#element').popover('show').popover('hide')
Hides an element's popover. Come back to the caller right before the popover has truly been covered (i.e. right before the hidden.bs.popover event takes place). This is considered a "manual" triggering of the popover.
$('#element').popover('hide').popover('toggle')
Button an element's popover. Returns to the user just before the popover has actually been shown or hidden (i.e. right before the shown.bs.popover or hidden.bs.popover event takes place). This is looked at a "manual" triggering of the popover.
$('#element').popover('toggle').popover('dispose')
Disguise and wipes out an element's popover. Popovers which put to use delegation ( that are built working with the selector possibility) can not really be separately eliminated on descendant trigger components.
$('#element').popover('dispose')Events
$('#myPopover').on('hidden.bs.popover', function ()
// do something…
)Check out several video clip training regarding Bootstrap popovers
Connected topics:
Bootstrap popovers approved records
Bootstrap popovers short training
Bootstrap Popover complication